Major
Project
Article

SEPT/OCT
2003
Volume 46/Issue 5
IN
THIS ISSUE
Project
Articles
•
Queen Anne Living Room Tables
• Covered Wagon Toy Box
• Tilting Shelf Sewing Thread Holder
DEPARTMENTS
•
Ask Smitty
• Owner’s Gallery
• Letters from Owners
Academy Notes
Clean
Cuts - Pt. 2 - Lathe Tool Sharpening
Service Pointers
MARK
V Miter Gauge
Safety Tips
Safety First!
What's
New
42"
Filter Hood for DC3300
EDUCATION
• Find
A Shopsmith Woodworking Academy Near You
• National
Woodworking Academy in Dayton, OH
ONLINE
CATALOGS
• Online Accessory Catalog
• Request
Printed Accessory Catalog
• Online
Replacement Parts Catalog
MARK
V INFORMATION
• Find
A Shopsmith
MARK V Demo Near You
• Request
MARK V Information Package
LINKS
•
Links Worth Visiting
•
Free Woodworking
Tips
FEEDBACK
Contacting
Shopsmith
Copyright
2003.
Shopsmith, Inc.
All Rights Reserved
The Queen Anne Living Room Tables
Using an EXTREMELY SHARP bench chisel, carefully shave the pins cross-grain, just to the cutting line while all the pieces are still taped together (See Fig. 18). Verify the fit of the pins to the sockets in the Front piece by checking them at both sides of your stack.
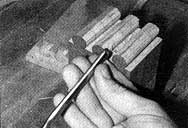 |
| Fig. 18. Shave all the pins in the stack just to the line. |
When you're confident that the fit is perfect, untape your stack of Side Pieces. Trial assemble the Sides in their proper positions and make any adjustments to their fit, if necessary.
Drilling the dowel
holes in the Tails
Using the same Horizontal Boring set-up that you used to drill the sockets
in the Drawer Fronts, dry assemble the Drawer Fronts and Sides then drill
1/4" diameter dowel holes through the exact centers of the Tails and into
the Drawer Fronts (See Fig. 19). Number each assembled Drawer joint so you'll
know which pieces join together during the final assembly process.
Using a 1/2" wide Dado set-up on the Table Saw, cut the vertical back Dado in each Drawer Side. Then use a 1/4" wide Dado set-up to saw the bottom grooves in each Drawer Side. Do not glue-up the Drawers yet.
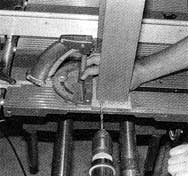 |
| Fig. 19. Drill the 1/4" dowel holes in the Drawer assembly. |
View
Plans &
Assembly Drawings
Coffee
Table
•
Side View
• Side Skirt &
Tenon
• Leg
Joinery
• Table End Skirt
& Tenon
• Drop Leaf Support
• Leg Pattern
• Side
Skirt Pattern
• End Skirt Pattern
End
& Corner Table
•
Side View
• End Table Front
View
• Leg
Joinery
• Table End Skirt
& Tenon
• Rail and Pin/Tenon
• Leg Pattern
• Side
Skirt Pattern
• End Skirt
Pattern
• Drawer
Assembly
• Drawer
Joinery
• Drawer
Glide
• Drawer
Glide Assembly
•
List
of Materials
Printer Freindly PDF copy of Instructions (864K)
