Major
Project
Article

SEPT/OCT
2003
Volume 46/Issue 5
IN
THIS ISSUE
Project
Articles
•
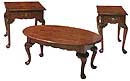
Queen Anne Living Room Tables
• Covered Wagon Toy Box
• Tilting Shelf Sewing Thread Holder
DEPARTMENTS
•
Ask Smitty
• Owner’s Gallery
• Letters from Owners
Academy Notes
Clean
Cuts - Pt. 2 - Lathe Tool Sharpening
Service Pointers
MARK
V Miter Gauge
Safety Tips
Safety First!
What's
New
42"
Filter Hood for DC3300
EDUCATION
• Find
A Shopsmith Woodworking Academy Near You
• National
Woodworking Academy in Dayton, OH
ONLINE
CATALOGS
• Online Accessory Catalog
• Request
Printed Accessory Catalog
• Online
Replacement Parts Catalog
MARK
V INFORMATION
• Find
A Shopsmith
MARK V Demo Near You
• Request
MARK V Information Package
LINKS
•
Links Worth Visiting
•
Free Woodworking
Tips
FEEDBACK
Contacting
Shopsmith
Copyright
2003.
Shopsmith, Inc.
All Rights Reserved
The Queen Anne Living Room Tables
Stack together and align the bottom edges of all similar Skirts and Lower Rails. Use masking tape to hold them together in the stacks. Layout each pattern on the top board of each stack, then use your Bandsaw to pad saw the lower contours of all Skirt and Rail sets.
Carefully cut the Drop Leaf Supports out of the Coffee Table side Skirts while they're still taped together. Use the long Drum Sander you created earlier to sand all the sawn contours BEFORE un-taping the stacks.
Once the sawn edges are sanded, tape the Drop Leaf Supports back into position in the Skirts from which they were removed. Using your Horizontal Boring setup, drill and counterbore the support pivot holes for #10 x 1-1/2" round-head wood screws. Install the screws and un-tape the supports.
Using a ripping blade on your Table Saw, cut the Top Retainer Slots in the Side skirts of the Coffee Table -- and the Upper Front Rails and the End Skirts of the End Table and the Corner Table. Mounting the Top Retainers in these pieces will allow unrestricted expansion and contraction of the tops with changes in temperature and humidity. Also, the Inside Drawer Glide will not interfere with the Top Retainer installation.
Prior to assembly, sand the Skirts and Rails thoroughly to remove any planer or Belt Sanding marks.
Drawer Glide Construction
The End Table and Corner Table Drawer Glides
are formed by simply cutting rabbets in the edges of narrow boards. However,
prior to making these rabbet cuts, drill and counterbore the holes for
#10 x 1-1/4" roundhead wood screws in the edges of the stock, then cut
the notches in their ends using your Bandsaw. Finally, form the required
rabbets by using your Table Saw with a Dado
Blade or Molding
Set-up and a straight-edged 1"
Jointer Knife Set.
Insert the screws into the drilled holes and use them as “punches” to mark the pilot hole positions on the inside of the Sides. Use your Drill Press with a 1/8" bit to drill the pilot holes in their marked positions.
Table Assembly
Prior to gluing-up the Tables, dry assemble and clamp each Table together
to verify the proper fit of all components. If all goes together nicely,
remove the clamps and disassemble the pieces.
Start the assembly process by gluing and clamping the front and rear pieces to their Legs. Be sure to wipe the glue squeeze-out from the wood with a water-soaked rag. Once the glue has dried thoroughly, assemble the Front and Rear sections together with the Sides and remove the glue squeeze-out in the same manner.
View
Plans &
Assembly Drawings
Coffee
Table
•
Side View
• Side Skirt &
Tenon
• Leg
Joinery
• Table End Skirt
& Tenon
• Drop Leaf Support
• Leg Pattern
• Side
Skirt Pattern
• End Skirt Pattern
End
& Corner Table
•
Side View
• End Table Front
View
• Leg
Joinery
• Table End Skirt
& Tenon
• Rail and Pin/Tenon
• Leg Pattern
• Side
Skirt Pattern
• End Skirt
Pattern
• Drawer
Assembly
• Drawer
Joinery
• Drawer
Glide
• Drawer
Glide Assembly
•
List
of Materials
Printer Freindly PDF copy of Instructions (864K)
