Major
Project
Article

JAN/FEB
2002
Volume 45/Issue 1
IN THIS ISSUE
Project
Articles
•
9-Drawer Workshop Toolbox
• Child's Desk and Chairs
• Candle Sconce and Desktop Pencil Holder
DEPARTMENTS
•
Ask Smitty
• Owner’s Gallery
• Letters from Owners
Academy Notes
Finishing
Touches - Pt.3 Applying a Natural Finish
Service Pointers
Speed
Changer
Safety Tips
Safety
Is
Your Decision
What's
New
The
Standard Anniversary Model Shopsmith MARK V
EDUCATION
• Find
A Shopsmith Woodworking Academy Near You
• National
Woodworking Academy in Dayton, OH
ONLINE
CATALOGS
• Online Accessory Catalog
• Request
Printed Accessory Catalog
• Online
Replacement Parts Catalog
MARK
V INFORMATION
• Find
A Shopsmith
MARK V Demo Near You
• Request
MARK V Information Package
LINKS
•
Links Worth Visiting
•
Free Woodworking
Tips
FEEDBACK
Contacting
Shopsmith
Copyright
2002.
Shopsmith, Inc.
All Rights Reserved
The Workshop Toolbox
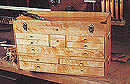
Step 14: Dry assemble the drawers upside-down by first clamping the drawer sides (W) to the drawer fronts (V) and backs (X)...while sliding the bottoms (Y) into position from the back. Check for squareness. For final assembly, follow the same steps except use glue in all corner joints (NOT the bottom).
Turn the drawers over. Slide the bottoms into the drawer side grooves from the back. Drive two or three 1" wire brads through the pegboard bottom and into the bottom of the drawer backs. Do not use glue. This will allow the bottoms to move...as well as providing for easy drawer bottom replacement if this should be necessary in the future.
Step 15: Sand the drawers to fit on a stationary belt sander (See Fig. 2), starting with the bottom drawer. Be sure to mark all drawers for location to ensure the best fit...and avoid getting them switched.
Step 16: Belt sand the top of the base and the bottom of the box. Fasten the box to the base with bolts and the Tee-Nut fasteners.
Belt sand the top, sides, back and front (with the drawers in place). Be very careful not to sand through the veneer face of the top and the back. Round the edges very slightly -- and very carefully using a sanding block with very fine paper or a radius plane. Remove the drawers, then disassemble the box and base.
Step 17: Cut the lid from the box (See Fig. 3) on your table saw. A hollow-ground planer blade would produce the best results. Set your saw's depth-of-cut at 9/16". At this setting, you will cut through the 1/2" thick lumber, but not through the glue blocks. Finish the job (in the corners) using a hand saw, then smooth all sawn surfaces with a block plane or a sanding block with very fine sandpaper.
Step 18: Drill the 1/4" drawer lock holes in the drawer fronts. The 3/16" diameter rods will slip into these holes, securing the drawers shut.
It's vital that all of these holes align perfectly with the holes you drilled earlier in pieces B, E & P in Step 7 above. The best way to do this is to start with the top drawers and mark the hole locations by shutting the drawer and dropping your 1/4" drill bit down through the hole in the piece above it, marking the holes in the drawer front. Remove the bit and use your drill press (set at a PERFECT 90-degree vertical angle) to drill through the drawer front. Repeat this process for each set of drawers as you move towards the bottom.
View
Plans &
Assembly Drawings
Final
Assembly
Front Layout
Box Side Layout
Partition Assembly
Base Side Layout
Box to Base Connection
Drawer Construction
Drawer Partition Layout
List
of Materials
Printer Freindly PDF copy of Instructions

Fig. 2 Use the Belt Sander to sand the drawers to fit.

Fig. 3 Use the Table Saw to cut the lid from the box.
