 Finding
storage space in a garage or basement can be a real challenge. If all
the floor and/or wall space is already in use, it may seem that the only
solution is to move or add-on to your shop space. But look up –
and cheer up ! There’s ample unused space directly
above your head.
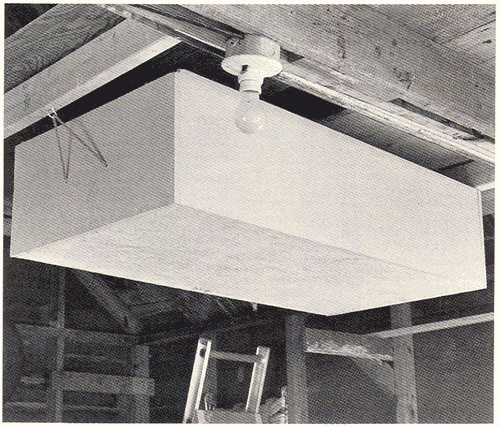
This simple-to build overhead storage box will make good use of that unused
space. Attached to the overhead joists with a couple of inexpensive strap
hinges, the box swings down for easy access to its contents. So, get your
clutter out from underfoot and put it overhead
…where it belongs !
1: Cut your stock
to size according to the bill of materials. We used a 5/8”A/B plywood
for the box and tempered hardboard for the lid…which also acts as
a dust cover and is optional. MDF or particleboard would also work nicely
for this project.
2: Cut 1/4” wide X 1/4” deep grooves for the lid in the sides
(A) using your Dado Blade or Router
3: Assemble parts (A, B, C, & D) with glue and 6d nails or #8 x 1-1/4”
wood screws. Paint or apply the finish of your choice.
4: Cut the lid (E) to final dimension and check for fit. The lid is secured
to the box with a clinch pin, however any pin or rod would work.
5: Attach the strap hinges to the box. Locate the positions of these hinges
so they’ll attach to the centers of your joists.
6: Mount the box to the joists. Make sure the box clears the wall when
it’s in the down (open) position.. Nail a 2” x 4” block
between the joists flush with the front of the box, and attach the hasp
to the front edge of the box and block.
List of Materials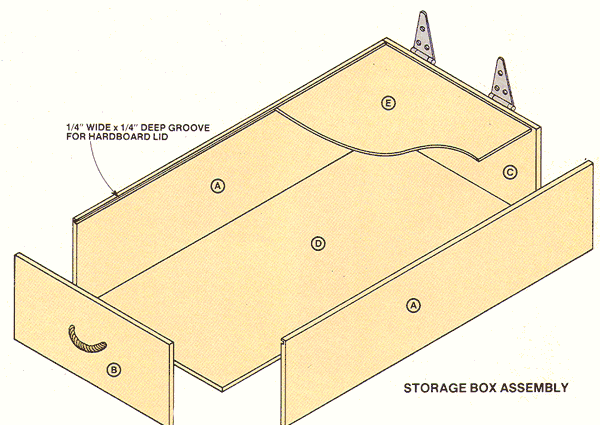
(finished dimensions in inches)
A: Sides (2) 5/8 x 12 x 47-3/4
B: Front 5/8 x 11-1/2 x 24
C: Back 5/8 x 12 x 24
D: Bottom 5/8 x 22-3/4 x 47-3/4
E: Lid 1/4 x 23-1/4 x 48
Miscellaneous
5” strap hinges (2)
Hasp with rotating staple
2” x 4” block (cut to fit)
Click to Enlarge .....................
|
 Find
A Shopsmith Woodworking Academy Near You