Picture

ISSUE ARCHIVES

NOV/DEC 2000
Volume 43 /  Issue 2

IN THIS ISSUE
Project Articles
Grandfather Clock, Part 2
Toy Crane
Chess Set

DEPARTMENTS
Ask Smitty
Owner’s Gallery
Letters from Owners

Academy Notes
Six easy steps to squaring a board
 
Find A Shopsmith Woodworking Academy Near You
 
Service Pointers
 
Safety Tips
Dust Collection ­ It Shouldn’t be an Option!

SURF’S UP
Three New Accessories for Your MARK V
Specials & Online Catalog
Links Worth Visiting
Find A Shopsmith
MARK V Demo Near You

FREE FROM SHOPSMITH
Free Woodworking Tips
Request Accessory Catalog
Request MARK V Video
Request MARK V Information Package

FEEDBACK
Subscribe/Renew
Contacting Shopsmith

Copyright 2000.
Shopsmith, Inc.
All Rights Reserved

Picture

Major
Project
Article

A Clockmaker’s Diary
SECOND INSTALLMENT -- The Waist Assembly

WEEK ENDING OCTOBER 24:
 
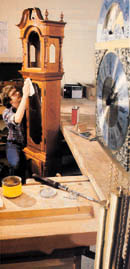
The lower molding is a three-piece affair. If it were only one piece, the upper bead would get in the way of making the cove.  The contours of this lower molding will hide the glue joints.  When I got around to gluing-up the miters on the moldings, I discovered that I didn’t need to clamp them. I just held them by hand for about a minute to make sure the aliphatic resin glue made a good bond between the two pieces of wood. Them, I simply set them aside to let them dry completely.  There was plenty of “set” between the pieces to keep the joint tight.
 
Next, I made the upper and lower rails for the Waist.  Since the construction of the doors for the Waist and the Base will be about the same, I’ll hold off on making the Waist door for right now and make them both together when I make the door for the Base.
 
To be continued in the next issue of “Hands-On”

Picture

View Plans &
Assembly Drawings
 
Overall Dimensions
Corner Detail
Molding Detail
Waist Assembly