Weekend
Project
Article

MAY/JUN
2003
Volume 46/Issue 3
IN
THIS ISSUE
Project
Articles
•
Wall-Hung Curio Cabinet
• Mobile Potting Table
• Pencil and Stamp Holder
DEPARTMENTS
•
Ask Smitty
• Owner’s Gallery
• Letters from Owners
Academy Notes
Furniture
Joinery
Service Pointers
MARK
V Speed Change Mechanism
Safety Tips
Safety Do's and Don'ts
What's
New
Shopsmith
and Lowe's Team Up
EDUCATION
• Find
A Shopsmith Woodworking Academy Near You
• National
Woodworking Academy in Dayton, OH
ONLINE
CATALOGS
• Online Accessory Catalog
• Request
Printed Accessory Catalog
• Online
Replacement Parts Catalog
MARK
V INFORMATION
• Find
A Shopsmith
MARK V Demo Near You
• Request
MARK V Information Package
LINKS
•
Links Worth Visiting
•
Free Woodworking
Tips
FEEDBACK
Contacting
Shopsmith
Copyright
2003.
Shopsmith, Inc.
All Rights Reserved
The Mobile Potting Table
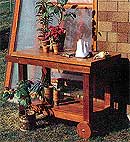
Cut Shelf to size and notch for the legs, as indicated. Now, cut a series of 48" long 2" x 4" strips for making the Top work surface. To be safe, cut nine pieces, 3-1/2" wide by 48" long...joint both opposing edges of each piece...then join them together using glue and dowels or biscuits. When dry, cut the Top to its finished size of 27-1/2" x 48" and use a saber saw or hand-held router to create the top cutout to fit a standard plastic tub of your choosing.
Cut out (6) 8-1/2" square x 3/4" thick pieces of stock for the wooden wheels. Glue them together and allow to dry. Using your Scroll Saw...or your Bandsaw with a Circle-Cutter, cut your Wheels to an 8" diameter.
Cut (16) 2" long pieces of 3/4" diameter dowel rod and (22) 5/8" long pieces of 5/8" diameter dowel rod (for lag screw plugs). Use an auxiliary, shop-made wooden Miter Gauge face and Shopsmith's Miter Gauge Stop Rod to make quick work of cutting identical-length dowels. Round-over both ends of each 3/4" dowel and one end of each 5/8" dowel with your Disc Sander for easier insertion.
DRILLING:
Using your MARK V Drill Press set-up, drill blind, 1-1/4" diameter x 1-1/8"
deep holes in the inside edges of the Top Side Rails to accept the 1/14"
diameter Dowel Handle.
Drill (16) 3/4" diameter x 1-1/8"" deep holes in the ends of the two bottom Shelf End Rails and Shelf Side Rails...and (16) matching 3/4" diameter x 1-1/8" deep holes in the inside surfaces of the four legs for attaching the four Shelf Rails to the Legs, as shown in the drawing.
Drill (22) 5/8" diameter x 3/4" deep counterbores in the three Top Support Rails (not the center rail), Top Side Rails and Bottom Shelf Side Rails to accept the heads of the 1/4" Lag Screws (and the socket wrench required to tighten them).
Using the same Drill Press set-up, drill 1/4" diameter through-holes in these same locations for the Lag Screw shanks.
Drill 9/16" diameter through-holes in two of the legs to accept the 1/2" diameter wheel Axle (NOTE: If using store-bought wheels, this axle diameter may be different.)...then drill a 1/2" diameter hole in the center of each wheel.
View
Plans &
Assembly Drawings
Assembly Plans
List of Materials
Printer Friendly PDF copy of Instructions
