Major
Project
Article

MAR/APR
2003
Volume 46/Issue 2
IN
THIS ISSUE
Project
Articles
•
Classic Rolltop Desk
• Keyed Corner Jewelry Box
• Colonial Spice Cabinet
DEPARTMENTS
•
Ask Smitty
• Owner’s Gallery
• Letters from Owners
Academy Notes
Basic
Techniques for Faceplate Turning
Service Pointers
MARK
V Quill Feed Maintenance
Safety Tips
12
Valuable Lathe Safety Tips
What's
New
Wall
Mounted Storage System for Tables
EDUCATION
• Find
A Shopsmith Woodworking Academy Near You
• National
Woodworking Academy in Dayton, OH
ONLINE
CATALOGS
• Online Accessory Catalog
• Request
Printed Accessory Catalog
• Online
Replacement Parts Catalog
MARK
V INFORMATION
• Find
A Shopsmith
MARK V Demo Near You
• Request
MARK V Information Package
LINKS
•
Links Worth Visiting
•
Free Woodworking
Tips
FEEDBACK
Contacting
Shopsmith
Copyright
2003.
Shopsmith, Inc.
All Rights Reserved
The Classic Rolltop Desk
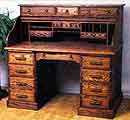
9. Top Drawers. A locking drawer joint is used on the Top Drawers (see Top Drawer Construction drawing). For parts JJ through QQ, repeat the same construction procedures as in step 8.
10. Finishing. Prior to final assembly, apply the finish of your choice to the Insert, Tambour and Frame.
11. Assembly. Insert the Tambour into the grooves in the Sides (D). Attach the Rolltop to the Desktop with dowels, but do not glue, as this makes the desk easier to disassemble in the event you have to move it. Have someone help you lower the assembled Rolltop onto the dowel holes in the Desktop.
Next, attach the Bottom Rail (C) to the Desktop using #9 x 1-1/4" flathead wood screws. Nail the back (E) into place using small brads or 2-penny nails. Finally, select and install the hardware of your choice and enjoy!
View
Plans &
Assembly Drawings
•
Side View
• Top
Drawer
• Insert Drawer
• Front View
• Scroll Details
• Rolltop
Assembly
•
List
of Materials
Making
Tambours Article
Printer Friendly PDF copy of Instructions
