Money
Maker
Article

JULY/AUG
2005
Volume 48/Issue 4
IN
THIS ISSUE
Project
Articles
•
The Heirloom Cradle
• The Spirit of St. Louis Toy Airplane
• Making All-Purpose Wooden Boxes
DEPARTMENTS
•
Ask Smitty
• Owner’s Gallery
• Letters from Owners
Academy Notes
Properties of Cabinet Lumber
Service Pointers
Bandsaw
Service Pointers
What's
New
Lift-Assist
EDUCATION
• Find
A Shopsmith Woodworking Academy Near You
•
National
Woodworking Academy in Dayton, OH
ONLINE
CATALOGS
• Online Accessory Catalog
•
Request
Printed Accessory Catalog
• Online
Replacement Parts Catalog
MARK
V INFORMATION
•
Find
A Shopsmith
MARK V Demo Near You
•
Request
MARK V Information Package
LINKS
•
Links Worth Visiting
•
Free Woodworking
Tips
FEEDBACK
Contacting
Shopsmith
Copyright
2005.
Shopsmith, Inc.
All Rights Reserved
Making all-purpose wooden boxes
Step 8: Once the glue has dried, use your Belt Sander to sand the box(es) so the tops & bottoms are flush with the sides.
Next, use your Bandsaw with a 5/8" resawing blade to cut the lid from the box. If you like, you can tilt your Bandsaw table 5 to 10-degrees when doing this for a different look (See Fig. 7). Be sure to follow-up by belt sanding the rims carefully to be sure they're flat and true.
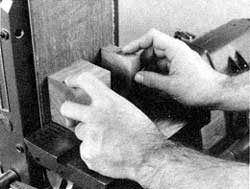 |
| Fig. 7. Use the bandsaw to cut the lid from the box. Use a belt sander and carefully remove the saw marks from the top and bottom rims. |
Step 9: Mount the hinges, attach the lid, then apply the finish of your choice.
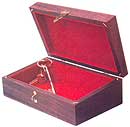
As you can see, the potential for boxes is limitless. Using various woods, altering their sizes, adding partitions, inlaying decorations or adding decorative hardware are only a few creative ways to mass-produce stunning gift boxes for friends and relatives.
View Plans &
Assembly Drawings
• Handle Layout
• Jig Assembly
• Fence Detail
• Figure 1
• Figure 2
List
of Materials
Printer Friendly PDF copy of Instructions (825K)
